
Long before you ever bring out a clock, you can start laying the groundwork for telling time. The secret is to weave the concepts of sequence and duration into your daily life. This way, time becomes a familiar and concrete idea instead of an abstract puzzle they have to solve later.
Building a Foundation Before the Clock

Before you think about hours and minutes, the real goal is to help your child develop an intuitive feel for the flow of time. This is not about formal lessons. It is about making time a natural part of your everyday conversations and routines.
When you do this, you connect a big and abstract idea to the small and predictable events that make up their world. You are creating a rhythm they can actually feel and understand. You can start this early, even with toddlers, just by narrating your day together.
Talk About the Rhythm of the Day
Use simple and descriptive words to mark different parts of the day. This connects their activities to a specific time, creating a mental timeline they can follow.
- Morning: "Good morning! The sun is up, so it is time for breakfast."
- Afternoon: "It is the afternoon now, which is our time to go to the park."
- Evening: "The sun is going down. In the evening, we read stories before bed."
This simple habit helps them mentally sort their day into distinct chunks. They start to link certain activities and even the light outside with words like "morning" and "evening" which is the very first step.
Introduce Sequence and Order
Understanding that things happen in a certain order is fundamental to grasping time. You can reinforce this just by using words that highlight the sequence of events.
Talk about what happens before an activity and what comes after a daily chore. For instance, "First, we will put away your toys, and then we get to have our snack." This language builds the framework for understanding time's linear progression.
That simple "first, then" or "before and after" structure is surprisingly powerful. It teaches not just sequence but also a bit of cause and effect, laying the groundwork for more complex time concepts down the road.
When they finally see a clock, they will already have an internal sense that the '3' comes after the '2', just like playtime comes after lunch. This prior knowledge makes the whole process of learning to read a clock feel much more logical and less intimidating.
Getting Hands On with the Analog Clock
Now it is time to bring the clock face to life. We are moving from ideas to a real and physical object they can touch and explore. This is where you will see the understanding really start to click. The mission is to make the clock feel less like a complex machine and more like a friendly puzzle.
We are going to lean heavily into hands on learning. The aim is not just for your child to parrot back the time, but for them to truly grasp how those moving hands represent the passing day. You might be surprised how a simple and homemade tool can often work better than an app at this crucial stage.
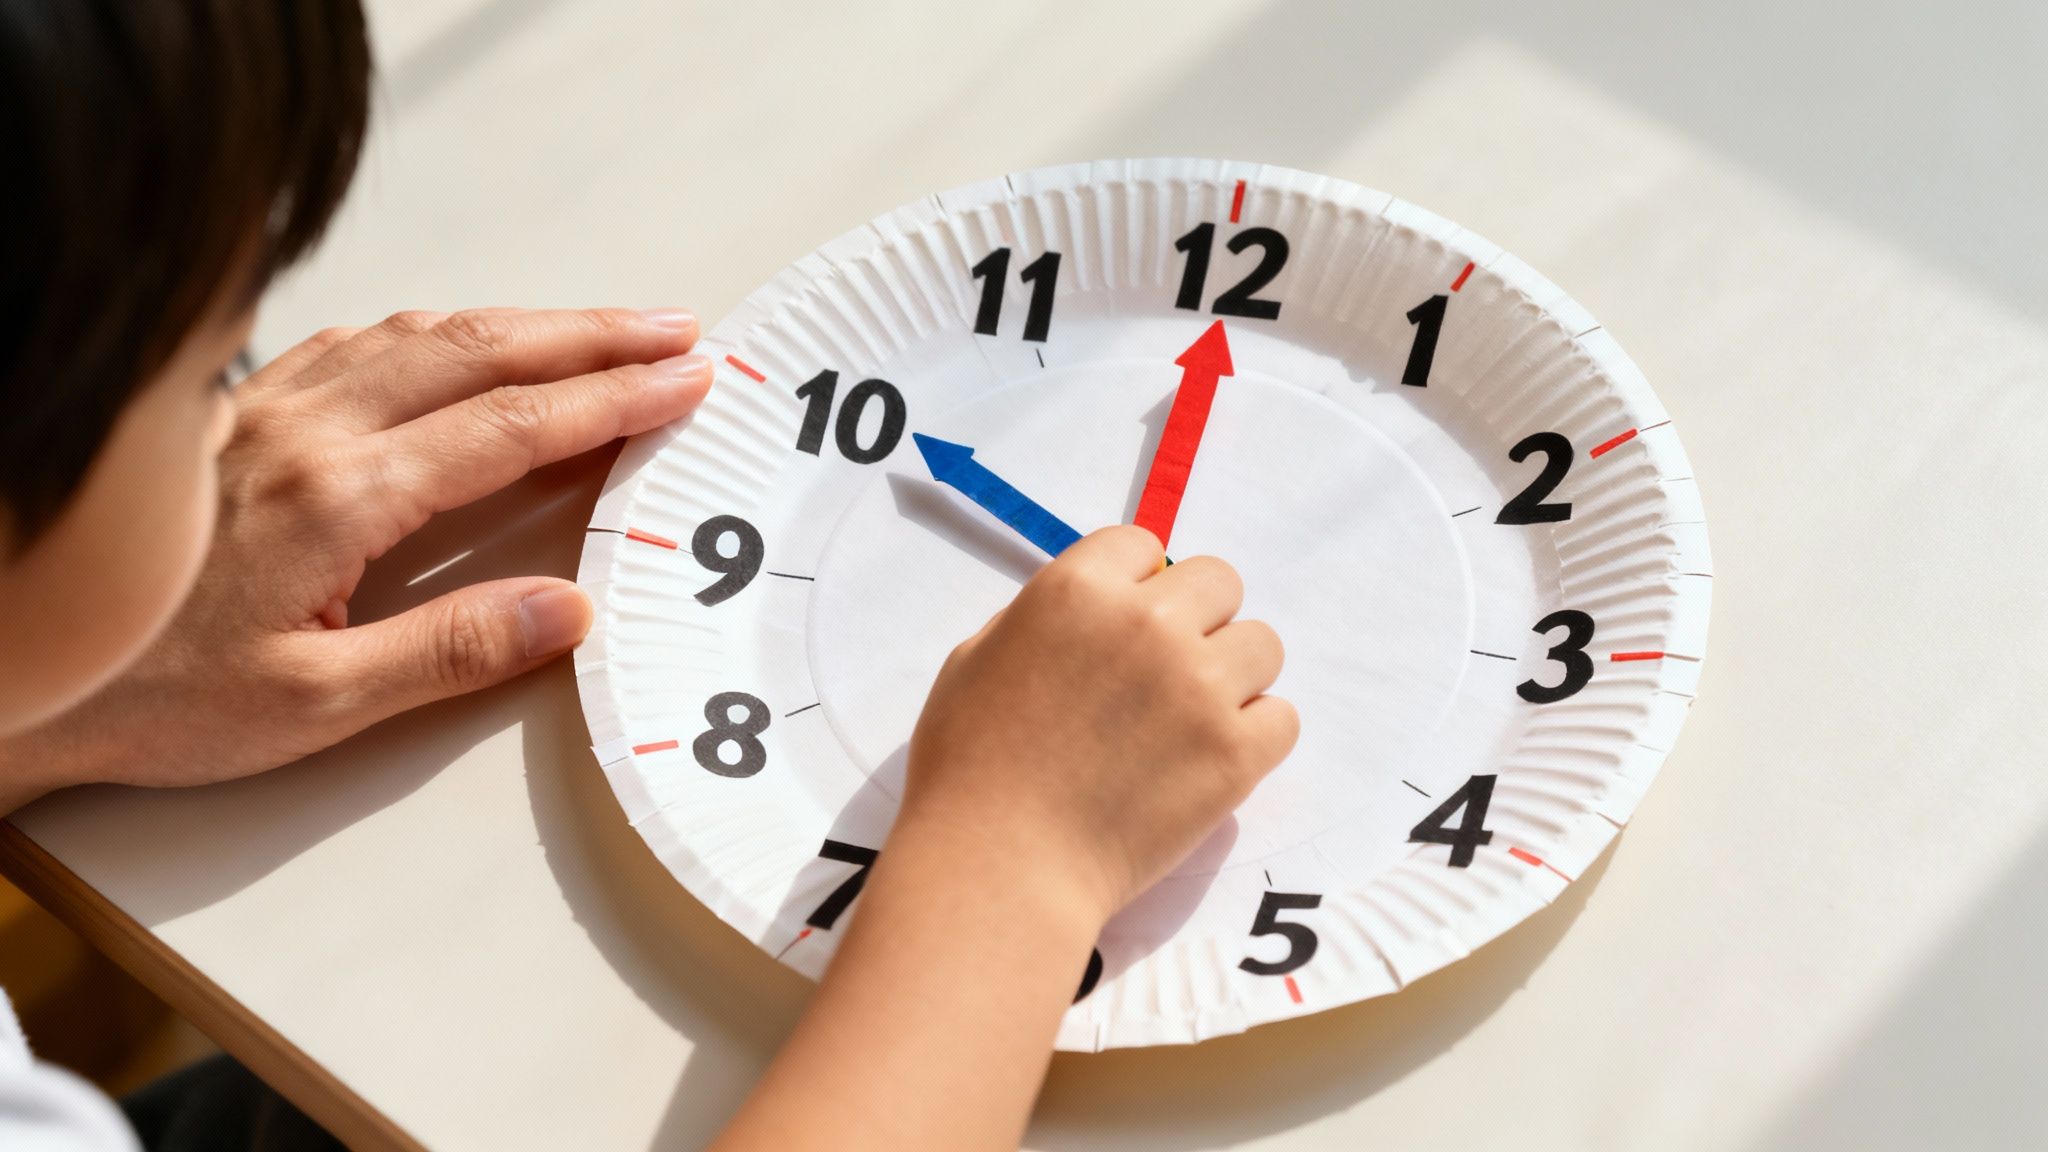
Craft a Paper Plate Clock Together
One of the best teaching aids you can have is a clock that your child can control. Making one together is a nice project that gets them invested and familiar with the clock face right from the start.
Here is what you will need:
- A sturdy paper plate
- A marker pen
- Two strips of card (one shorter for the hour hand, one longer for the minute hand)
- A brass fastener (sometimes called a split pin)
Start by writing the numbers 1 through 12 around the edge of the plate, just like you see on a real clock. Then, help your child poke the brass fastener through the ends of the two card "hands" and secure them to the centre of the plate. It helps to colour code the hands so maybe blue for the short hour hand and red for the long minute hand to make their different jobs clear.
This simple creation is more powerful than it looks. It lets your child physically move the hands, directly connecting their actions to the concept of time moving forward in a way that just watching a wall clock never could.
Isolate the Hour Hand First
A common mistake is trying to teach everything at once such as the hour hand, the minute hand, and counting by fives. It can be a recipe for frustration and make telling time feel "too hard." Instead, let's aim for some easy and confidence boosting wins.
For now, focus only on the short hour hand. You can even take the minute hand off your paper plate clock for a bit. Just like that, you have cut the complexity in half.
Point the short hand directly at the '3'. You can say something like, "When the little hand points to the 3, it is three o'clock. That is when we have our afternoon snack!" Then, move it to the '7' and say, "Now it is pointing to the 7. It is seven o'clock, which means it is nearly bedtime!"
Tying each hour to a specific and meaningful part of their day gives the number real context. It is no longer just a '7' as it is 'bedtime 7'. This simple association makes the concept stick.
Go over this again and again. Call out different hours and have them move the little hand to the right spot. Celebrate every correct answer. Once they have completely nailed the hour hand, and only then, is it time to bring back the long minute hand.
This one step at a time approach builds a solid foundation for everything that comes next. Later on, as they get more confident, you can have fun exploring the world of real timepieces together. A great way to do this is by browsing some of the best analog watches to see how these fundamental concepts apply to well designed watches.
Making Time Meaningful in Their Daily Lives

Once your child gets the hang of the clock's mechanics, the real learning can start. This is where we bridge the gap between abstract numbers and the actual rhythm of their day. It is one thing to be able to say “four o’clock,” but it is another level of understanding to know that four o’clock is when their favorite show starts.
This is the key to making the skill stick. We are moving beyond just reading a clock and into the realm of using time. This shift is what turns a classroom exercise into a practical tool they will genuinely want to use every day.
Connecting Time to Their Routine
The best way to make time feel real and tangible is to weave it directly into the predictable events of your child's schedule. Instead of just quizzing them on the clock, start referencing it for things they care about.
Suddenly, the clock becomes a source of excitement and anticipation rather than just a test.
- Build excitement for events: "Grandma is coming to visit! Look, when the big hand points to the 6 and the little hand is on the 5, she will be here."
- Manage daily activities: "Screen time starts at 4:30. Let's set the alarm clock together so we know exactly when it is time to play."
- Help with transitions: "It is 7:15, which means we have 15 more minutes of playtime before we need to start getting ready for bed."
This practice transforms the clock from a random object on the wall into an active participant in their day. It becomes the official announcer of good things to come, the countdown timer for fun, and a gentle guide that brings structure to their world.
The goal here is to make glancing at the clock a natural and useful habit. When a child realizes the clock holds the answers to their constant "when?" and "how much longer?" questions, they become intrinsically motivated to master it.
The Role of School in Reinforcing Time Telling
For school aged kids, the classroom environment is a great place for consistent reinforcement. School life runs on the clock, with bells dictating everything from the start of lessons and recess to lunch and home time.
This structured routine is particularly helpful. The consistent and day in day out exposure helps cement their understanding in a practical setting. For families who are homeschooling, creating a similar rhythm is just as important. You can find guidance in this homeschool daily schedule template to build that structure at home.
As they get older, this foundation in understanding and managing time becomes crucial. Before you know it, they will be handling their own schedules. When that day comes, getting them a personal watch is a great milestone. You might find our guide on the best watches for teenagers helpful for that next step.
From Analog to Digital: Making the Connection
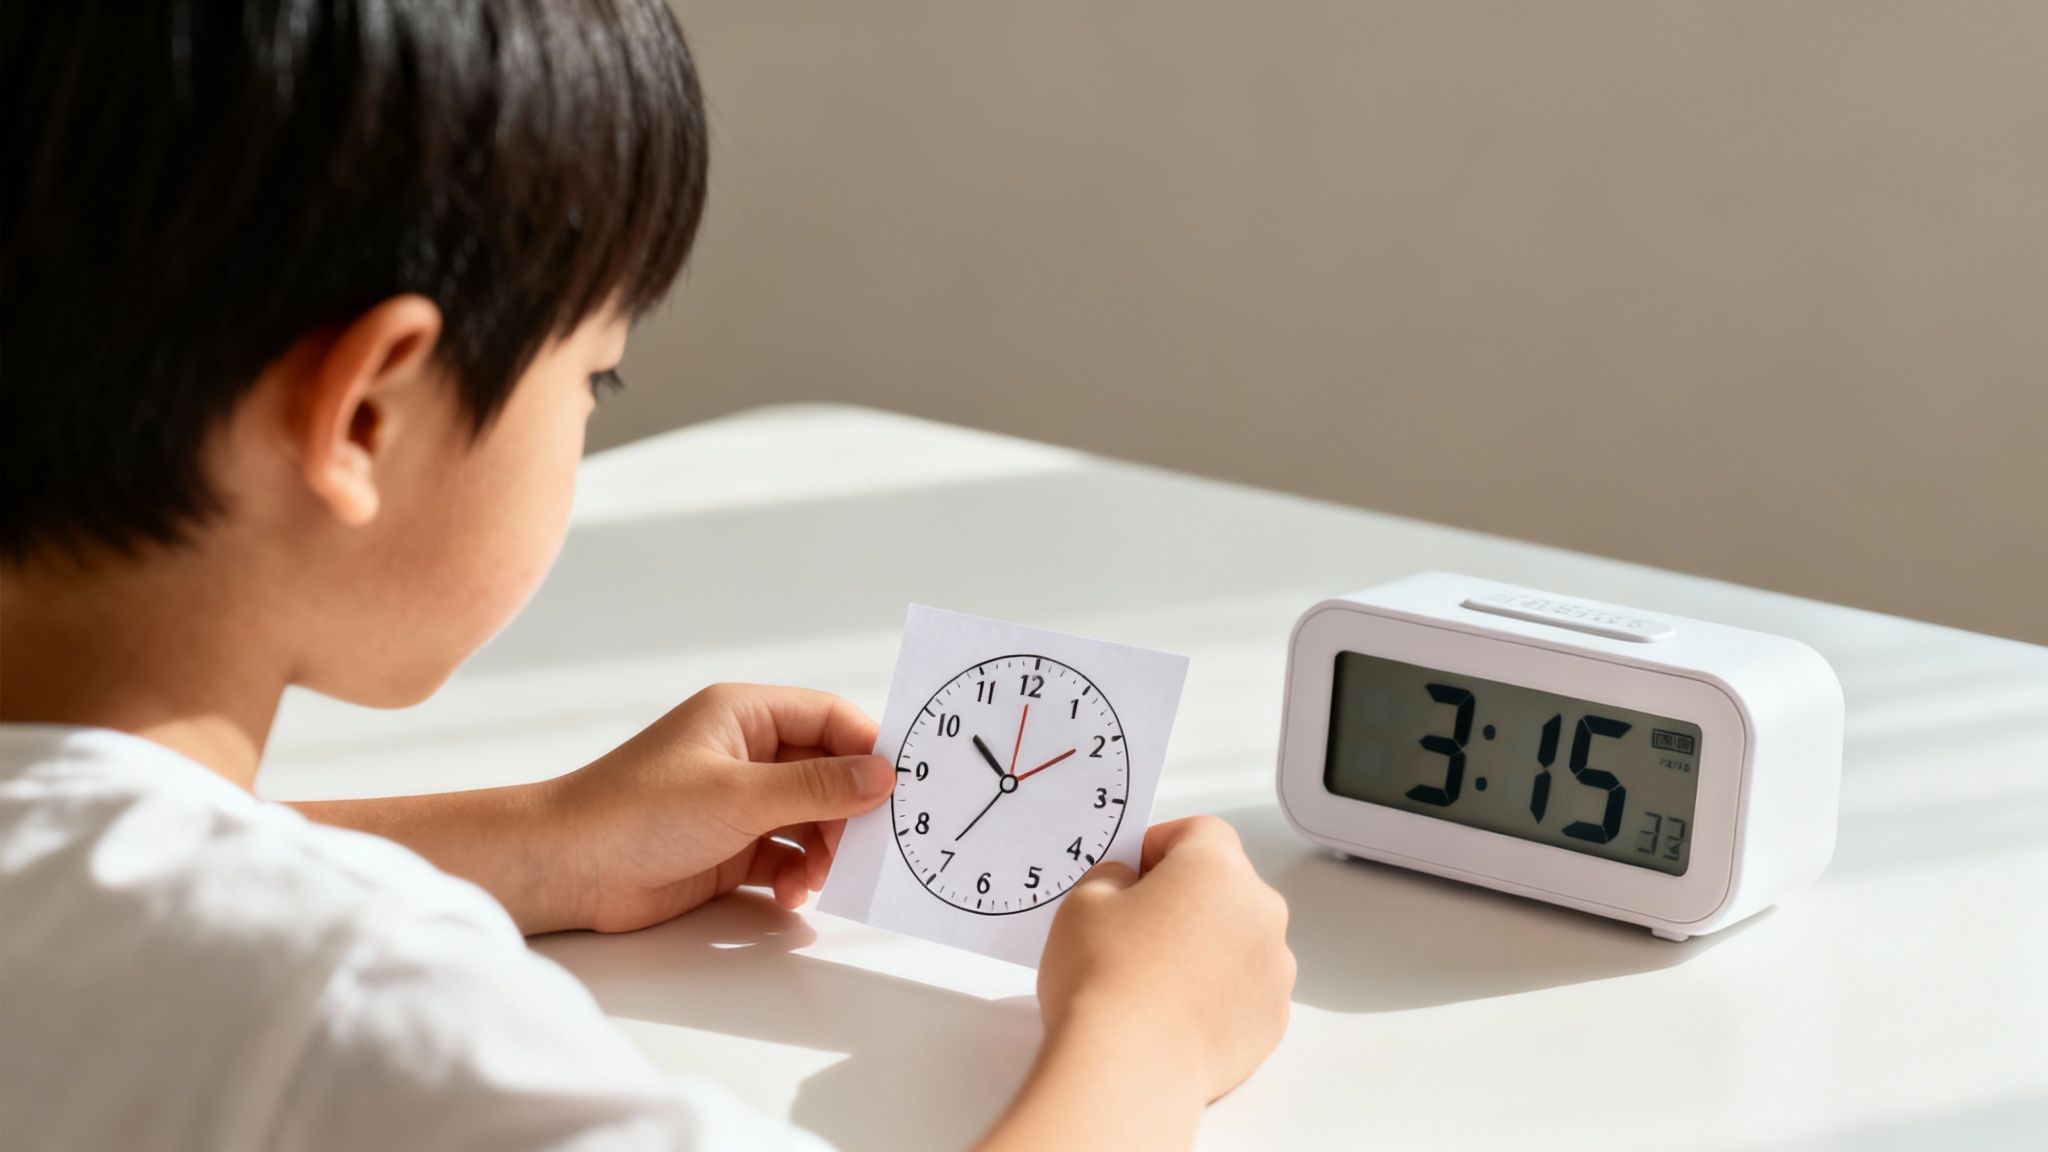
Once a child has a good handle on the face of an analog clock, digital time can feel like learning a whole new language. Our job is to bridge that gap and show them that "quarter past three" and "3:15" are just two different ways of saying the same thing. This is a crucial step in their time telling journey.
A good way to start is by placing your analog practice clock right next to a digital one. Set the analog clock to an easy time, like 4:00, and show them how it looks on the digital display. Then, slowly move the minute hand to the 6 and say, "Now it is half past four," while pointing to the digital screen showing "4:30".
This side-by-side comparison is powerful. It helps them create a mental map, connecting the position of the hands to the numbers on a screen. For some kids, especially those drawn to gadgets, the digital format might even click faster. If you are weighing your options, you might find it useful to read more about whether smart watches are worth it for introducing these ideas.
Introducing More Advanced Concepts
When your child can confidently switch between analog and digital formats, it is time to introduce some bigger ideas. These concepts require more abstract thinking, so make sure they have truly mastered the basics first.
A natural next step is explaining AM and PM. You can explain that because a clock only has 12 numbers, the hands have to go all the way around twice to make one full day. Anchor this to their daily routine, which they already understand.
- AM: This is morning time. It is for waking up, eating breakfast, and heading to school.
- PM: This is for the afternoon and evening. Think of it as time for playing after school, having dinner, and getting ready for bed.
Framing it this way helps them slot their entire day into these two categories, making the distinction feel natural.
A simple way to reinforce this is to ask questions throughout the day. "It is 7:00 now. Is that morning AM for breakfast, or evening PM for bedtime?" Connecting it directly to their life makes the concept stick.
Understanding Elapsed Time
The idea of elapsed time, which is figuring out how much time has passed between one point and another, is a pretty big cognitive leap. This is where they move from simply reading the clock to actually using time as a tool to measure and plan.
You can ease them into this with simple and real world scenarios. Try something like, "The movie starts at 3:00, and it is 2:30 right now. How many minutes do we have to wait?" Grab your practice clock and physically move the minute hand from the 6 to the 12, counting the minutes by fives together as you go.
This hands on method makes an abstract calculation feel tangible and real. It helps them see and feel what 30 minutes looks like on a clock face. Once they get the hang of this, you could even gently introduce the 24-hour clock, explaining it is a system used for things like flight schedules or by people in other parts of the world to avoid any AM/PM mix ups.
Navigating Common Roadblocks and Keeping it Fun
Every child is going to hit a few bumps on the road to telling time. That is perfectly normal. Frustration can creep in for both of you, but these moments are just learning opportunities. The real goal is to stay patient, keep things light, and remember this is a marathon rather than a sprint.
One of the most common hurdles is mixing up the hour and minute hands. Their different sizes and speeds are genuinely confusing for a young brain. A simple trick is to give them distinct personalities. You can call the short hour hand the "walking hand" because it moves so slowly, while the long minute hand is the "running hand" because it zips around the clock face.
This playful approach transforms a point of confusion into a memorable little story, making it much easier for them to remember which hand does what.
Untangling Tricky Time Phrases
Phrases like “quarter to” and “half past” can sound like a secret code to a child. The language is abstract and does not always line up with their concrete understanding of numbers. Think about "quarter to" as the hour hand is already pointing near the next hour, which can seem illogical to them.
Instead of just explaining it over and over, make it visual.
- Show, do not just tell: Grab your paper plate clock. Set it to 2:45 and physically move the minute hand from the 9 to the 12. As you move it, count the minutes together: “See? There are 15 minutes left until we get to three o’clock. That is what ‘quarter to three’ means!”
- Lean on analogies: A race is a great one. "The minute hand is on its last lap! It has just a quarter of the track left to go before it hits the finish line at the top."
This reframes the concept from a confusing rule into a logical and visual journey. It connects the abstract phrase to the physical movement of the hands, which is far easier for a child to grasp and hold onto.
Do not be afraid to take a break if you sense frustration building. Pushing through when a child is feeling overwhelmed is almost always counterproductive. A five minute break for a quick snack or a silly dance can reset their focus and keep the whole experience positive.
Turning Practice into Play
The secret to making these new skills stick is to make practice feel like a game rather than a test. When learning is fun, kids are more engaged and retain information better. Constant drilling leads to burnout, but gamifying the process keeps them excited to learn.
Try a “Time Scavenger Hunt.” Call out a time, like “1:30,” and have your child run to find a clock in the house, then set their own practice clock to match. Or, play a round of "What's the Time, Mr. Wolf?" but use a real clock face to shout out the times.
These simple games reinforce their learning in a joyful and low pressure way, ensuring that telling time remains an exciting new skill rather than a dreaded chore.
Your Questions on Teaching Time Answered
As you start teaching your child to tell time, you are bound to run into some questions. This journey is unique for every kid, and hitting a few bumps along the road is completely normal. Here are some straightforward answers to the most common things parents wonder about.
Think of this as your personal FAQ for those "am I doing this right?" moments.
At What Age Should a Child Start Learning Time?
While there is no single magic number, most children are ready to grasp the concept of telling time between the ages of 5 and 7. The groundwork often begins even earlier, around age 4, with simple ideas like ‘morning,’ ‘afternoon,’ and ‘night’. By the time they are in first or second grade, most school curriculums officially introduce telling time to the hour and half hour.
The best sign is your child's own curiosity. When they start asking, “How much longer until my cartoon starts?” or “When is Grandma coming?”, they are showing you they are ready to connect those abstract questions to the clock on the wall.
Should We Start with an Analog or Digital Clock?
Most teachers and child development experts recommend starting with an analog clock. Digital clocks seem so much simpler at first glance, but the visual movement of the hands on an analog clock builds a much stronger and more intuitive understanding of how time passes. It helps children actually see time moving.
This visual aid makes tricky concepts like ‘half past’ and ‘quarter to’ much easier for their brains to process. Once they have mastered the analog clock, picking up its digital counterpart is usually quite simple.
Seeing the hands sweep across the clock face gives a tangible sense of duration that a simple number change on a digital display just cannot replicate. This initial understanding is key to building deeper time related skills later on.
My Child Keeps Mixing Up the Hour and Minute Hands
This is probably the most common stumbling block out there, so you are not alone. A great trick that works time and again is to colour code the hands. Find a learning clock (or make your own) where the hour hand is blue and the minute hand is red, and then write the hour numbers in blue and the minute numbers in red around the edge.
Consistently referring to them as the ‘short blue hand’ for hours and the ‘long red hand’ for minutes helps forge that mental connection. You can also use physical objects during practice like a short crayon for the hour hand and a long pencil for the minute hand.
Once your child has a solid grasp of telling time, you can start building on that foundation. This parent's guide to teaching time management is a great next step for applying these new skills to daily routines.